
Get started
The fastest path from an invite code to your first plan, on the web or on iPhone. About five minutes.
Nurvia is invite-only while it grows. You need an invite code: five letters and numbers from your invite email or from the person who invited you. No code yet? Join the waitlist.
Setup asks one question in your own words and builds your first plan from the answer, so you finish with something real on screen. Pick the device you're starting on. Your account works on both.
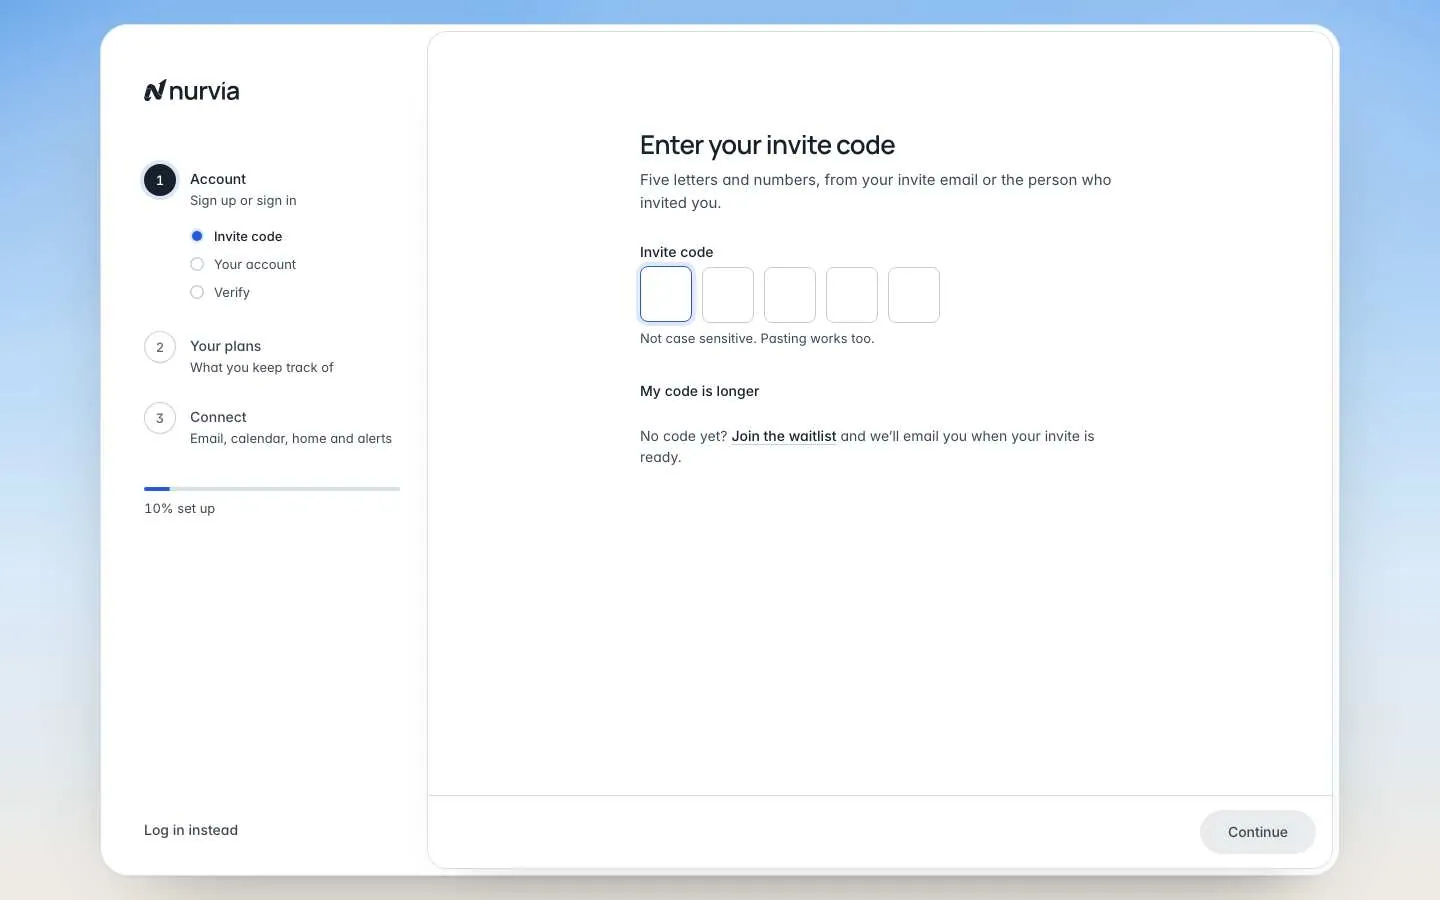
Enter your invite code
Open nurvia.app/dashboard and choose Enter your invite code. Type or paste the five characters (they aren't case sensitive) and choose Continue. Got a longer code? Choose My code is longer.
Create your account
Fill in First name, Last name, Email and a Password of at least 8 characters, confirm you're 18 or older and agree to the Terms, then choose Create account. Or use Continue with Google or Continue with Apple.
If your invite was sent to one email address, sign up with that address.
Verify your email
Enter the 5-digit code from your inbox on Check your email. Codes work for 10 minutes. Choose Send a new code if yours runs out.
Say what you keep track of
On What do you want to keep track of?, write it the way you'd say it:
Team offsite in Lisbon, March 12–14
Sara and Tom's wedding weekend in June
London show at the Roundhouse on Nov 3
Joining an existing team instead? Choose Join a team and enter the 5-character Team invite code from your invitation.
Check it, then set it up
Nurvia shows what it read: your first plan with its date and place, Where it lives (Personal, or It's for a team with a team workspace name), what Plans are called and your role. Change anything, then choose Set it up. Your first plan now exists.
Finish the short setup
Invite people on Who's coming?, connect Gmail or Outlook on Connect your email and calendar, set your home base, and choose how updates reach you. Choose Finish setup, then Open Nurvia.
Skipped something?
Every step after your account can be skipped. Anything you skip waits in the Get started card at the bottom of the sidebar on the web, so you can finish it whenever you like.
Add more plans
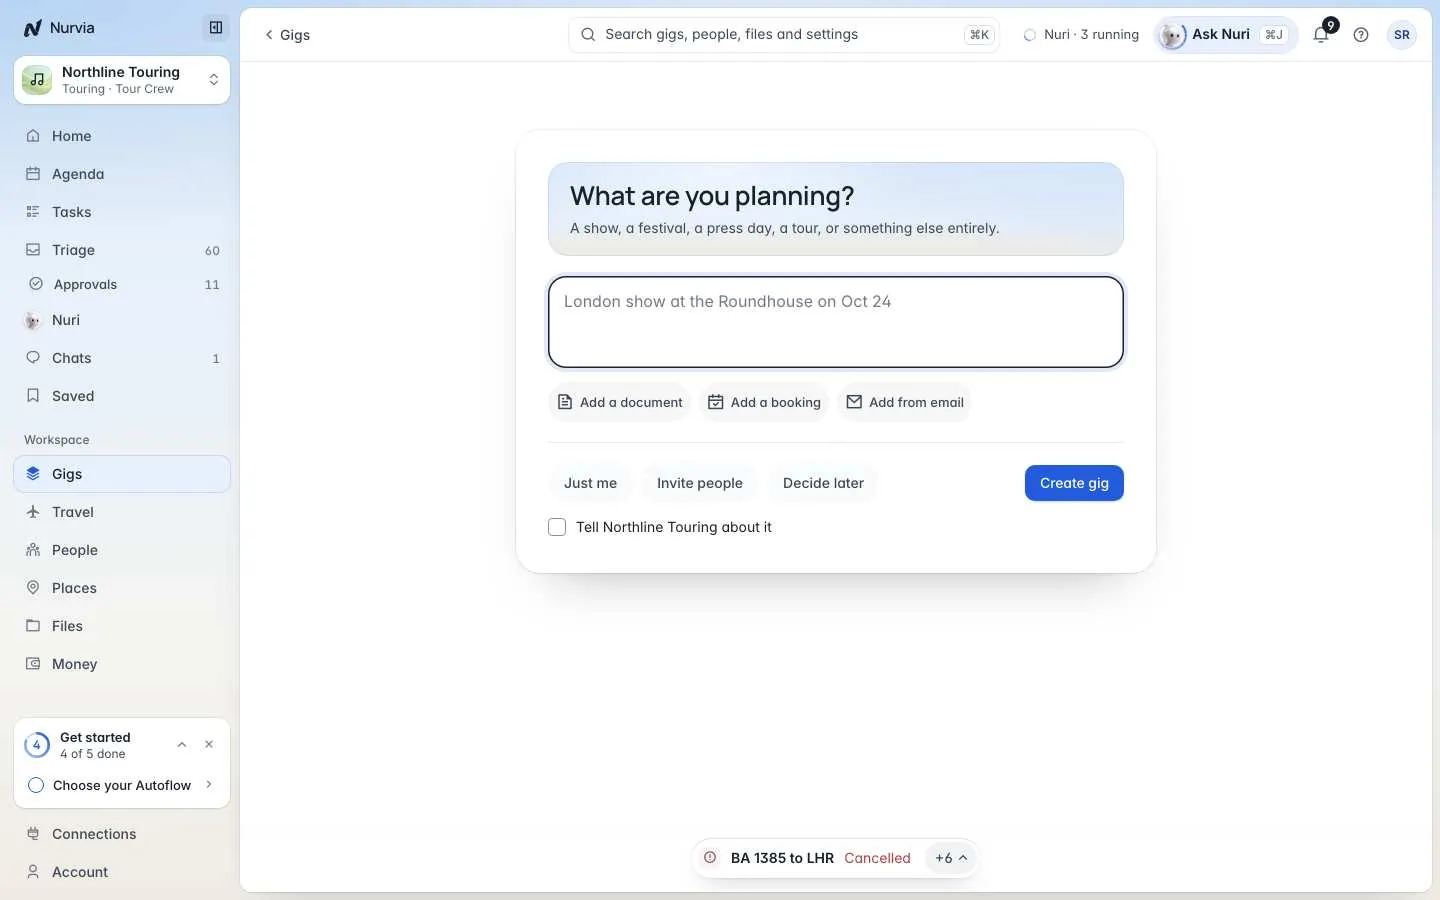
On the web, choose New gig (or New plan) on Home. Describe it in a sentence, attach a document or booking if you have one, and choose Create gig.
What happens next
A few minutes after you connect a mailbox, Nurvia starts reading your recent mail. Confirmed bookings go onto the right plan. Anything unclear waits in Triage as a short question. Reading your mail is separate from sending: Nuri sends only with your approval or a rule you set.