
Web app
Build a guest list, set access types, share request and door check-in links, and check people in on the night.
A plan with a venue has a Guests section for the guest list — who's coming, with which access, and who's already through the door. Guest lists are their own permission area, so Members don't see them by default.
Where to find it
- Web: open the plan, then Guests under People in the section list (or press G then G).
- iPhone: open the gig and tap Guests. See Run of show and guest lists.
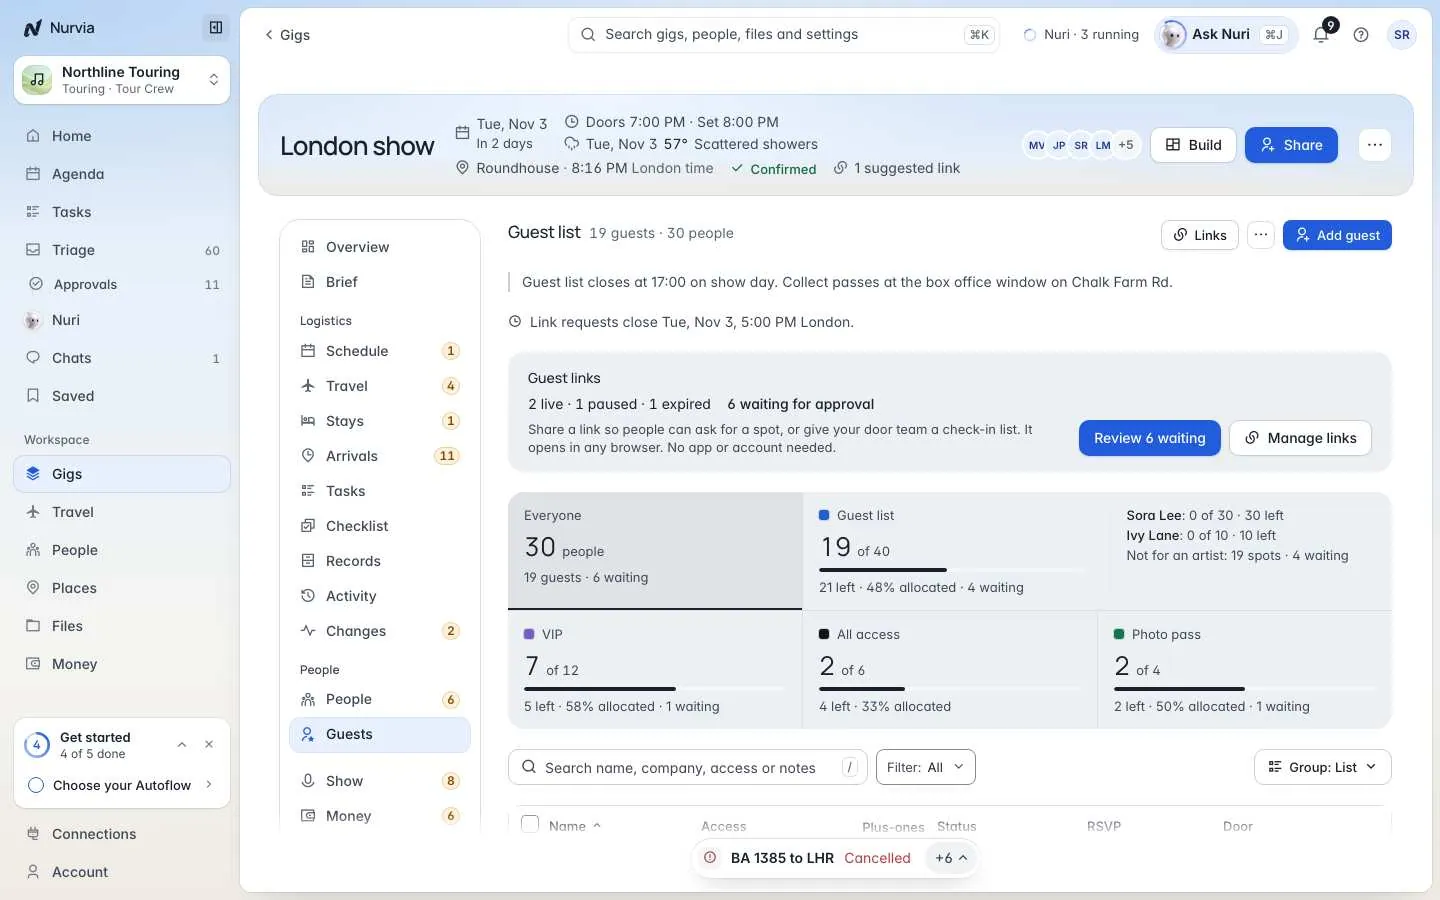
The top of the list shows your guest links and how many requests wait, then totals for each access type — how many spots are taken, how many are left, and who is still waiting.
Run a guest list
Add who is coming
Choose Add guest for one person, or Add from a list for many — a spreadsheet, CSV, PDF, Word file, a photo
of a printed list, a .vcf, pasted text or a forwarded email. Nurvia reads the file as text and never follows
instructions inside it. You can also Add from the crew or Add earlier guests.
Set access types
In List settings, add access types such as Guest list or VIP. Each one has a limit, a pass, a short code and its benefits.
Share a link
Choose Links (or Manage links) to make a request link for promoters, or a door check-in link for your door team. See Guest links.
Check people in
On the night, mark each guest Checked in — from the table, or from the door check-in link on any phone.
Add a guest
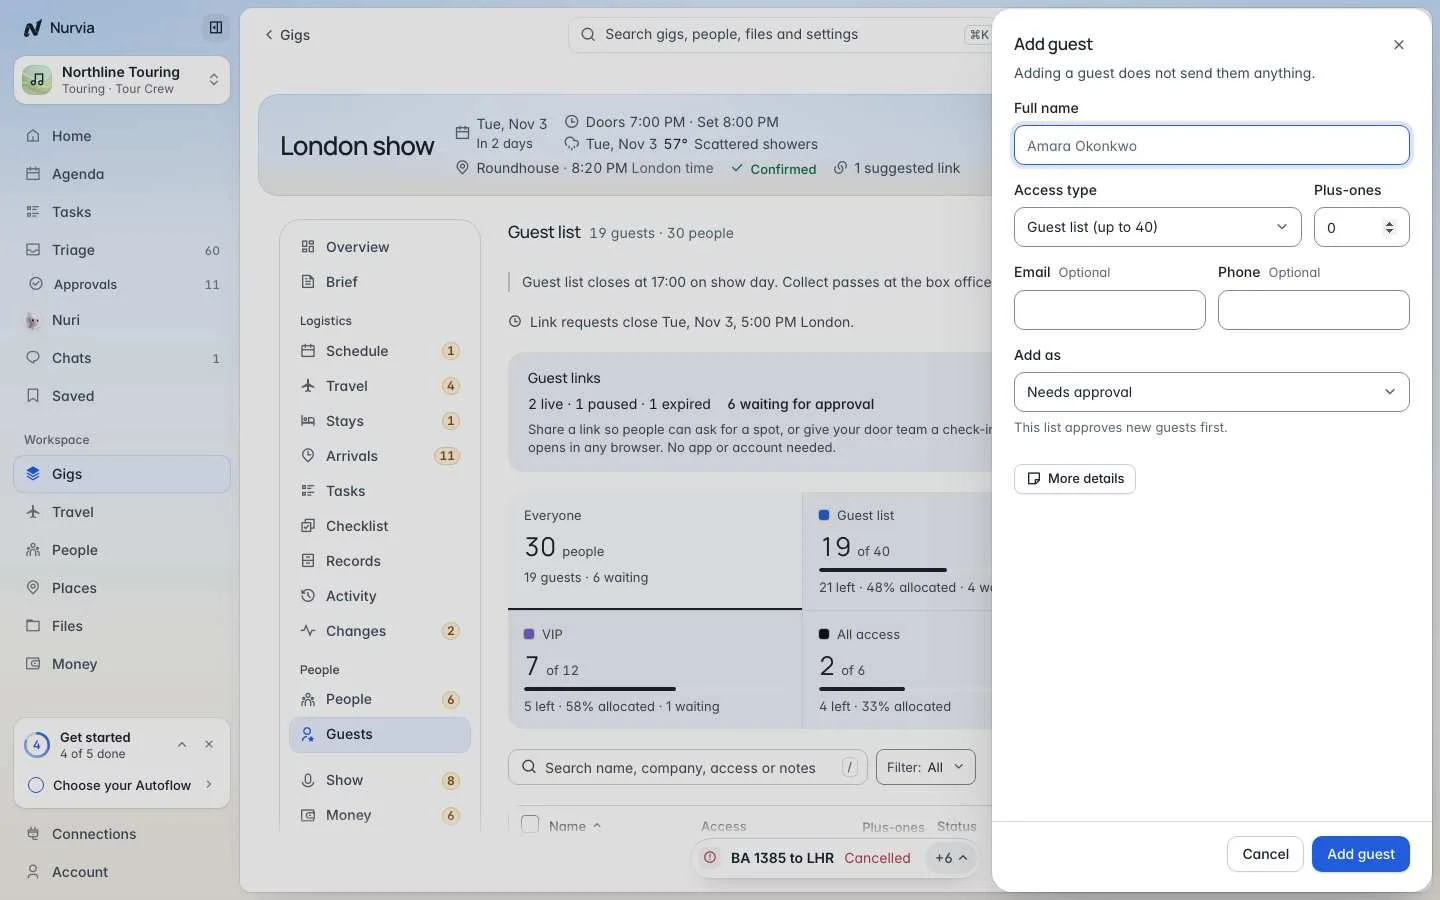
Each guest has a Full name, Access type and Plus-ones, with optional Email and Phone. Open More details for company, notes for the door, artist, coordinator, a pass photo and Crew notes — those are only for your team and never shared with the guest. Tick Save to guest directory to find them again for the next plan.
Guests are never contacted by Nurvia
Nurvia sends a guest nothing unless you turn on Email them an invite for that person.
Statuses
Every guest is Needs approval, Confirmed or Checked in. You can Decline a request and restore it to pending later, or Undo check-in. Filter the table by status, and group it By access type, By status or Who asked.
List settings
Open the ⋯ menu, then List settings:
- Access types, each with a limit, pass, short code and benefits.
- Approve new guests first — new guests wait in Needs approval.
- A request closing window, and what happens to requests after it closes.
- Where the list lives — a Nurvia list or an External link.
Guest links
Share a link that opens in any browser — no app or account needed. Choose Links, then make a new one.
People ask for a spot. Set the Link name, the access types people can ask for, Spots through this link, Plus-ones per request, whether to Approve requests first, and when the Link ends. Requests appear in Review requests and in Triage. The person asking sees either Your request is in or You are on the list, with a reference.
Pause a link with Link on, get a fresh address with Get new link, or Revoke link at any time. Promoters can also get an allocation link where they add their own guests and see only the names they added.
More tools
From the ⋯ menu: Copy to another plan (nobody is contacted), Export and Print envelope labels. An exported list ends with Totals by access type, and the same totals show above the table as you work.